About Me

- ebilfairy
- Hi I'm Sandra (also go by ebilfairy) I'm 38. Living with my parents, younger sister, her daughter Bella and one dog called Kiki.
Shout Out
Followers
Sunday 21 April 2013
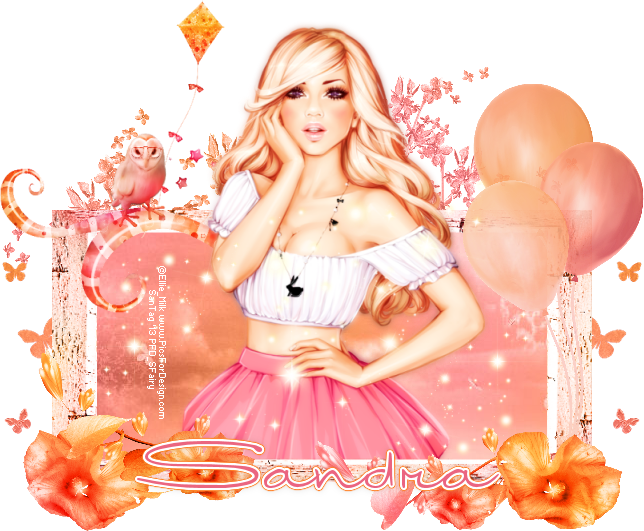
PTU Tutorial - Soft Dreams
This tutorial was written by me on 21st April 2013 any resemblance to other tutorials is a coincidence.
*****
*Supplies*
Scrapkit is a gorgeous PTU kit called Soft Dreams by Chichi.
Tube of choice - I'm using the gorgeous Sexy Alice by Ellie Milk. You must have licence to use this tube. You can purchase it at PFD.
Font International Palms.
*****
*Lets Get Started*
Open a new canvas 650x650
Copy Frame2_CD_SoftDreamsTS - Paste As New Layer.
Image - Resize 90% smartsize.
Move down the canvas a bit.
Activate the Magic Wand Tool - Selections - Modify - Expand - 5
Selections - Invert
Copy a paper of choice ( I used Paper21_CD_SoftDreamsTS) - Paste As New Layer
Press the small delete key on your keyboard.
Selections - Select None.
Layers Arrange Move Down.
Activate the frame layer.
Copy Flowers_CD_SoftDreamsTS - Paste As New Layer.
Move down so it's sitting at the bottom of the frame.
Copy Balloons_CD_SoftDreamsTS - Paste As New Layer.
Move to the right of the frame.
Layers - Arrange - Move Down.
Erase any of the strings visible beneath the flowers.
Copy Element1_CD_SoftDreamsTS - Paste As New Layer.
Image - Resize 70% smartsize.
Move to the top left of the frame.
Copy Branches_CD_SoftDreamsTS - Paste As New Layer.
Layers - Arrange - Send to bottom.
Move around until it's somewhere you like.
Copy Butterflies_CD_SoftDreamsTS - Paste as New layer.
Move to the left of the frame.
I erased some of the butterflies to make it look neater but that's up to you.
Image - Duplicate - Image - Mirror.
Add any drop shadow you like to the frame and elements.
Add your tube.
If your using the same tube as me I resized by 40% then 80%.
Layers - Duplicate.
Adjust - Blur - Gaussian Blur 3.
Change the Blend mode to Soft Light.
Layers - Merge - Merge Down.
If you want to make it look like she's sitting inside the frame follow these steps.
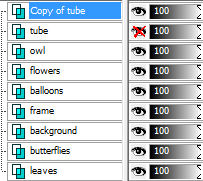
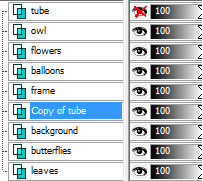
Duplicate your tube - Close off the original for now.
Move the duplicate tube down so that it is above the background layer.
Activate the background layer.
Selections - Select All - Float - Defloat.
Selections - Invert.
Press delete on your keyboard.
Selections - Select None.
Activate the original tube layer.
Eraser tool - erase the bottom of the tube.
Voilà - it should now looks like she is sitting in the frame.
I also added Sparkles2_CD_SoftDreamsTS but that's up to you.
Add your name & copyright.
Save tag as png.
Labels:Chichi Designz,Ellie Milk,PTU Tutorial
Subscribe to:
Post Comments
(Atom)


0 comments:
Post a Comment