About Me

- ebilfairy
- Hi I'm Sandra (also go by ebilfairy) I'm 38. Living with my parents, younger sister, her daughter Bella and one dog called Kiki.
Thursday 29 March 2012
FTU Tutorial - Forever

Supplies
Scrapkit Twilight Forever Part 2 Honeymoon by Jenny's Designz 7th kit donw on the page here.
Tube by Ismael Rac. You must have a licence to use his tubes.
Font of choice the one I used is called Inspiration.
Lets Get Started
Open a new Canvas 650 x 650
Copy & paste frame5 as a new layer
Image - resize 60% - 60%
Freehand Selection Tool with these settings

Draw a selection around the center of the frame
Copy & paste Flower3 as a new layer - duplicate it 3 times so you have 4 flower layers.
Move the flowers around the circle until it's all covered.
Merge all flower layers together.
Selections - Invert.
Press the small delete key on your keyboard to get rid of the excess flower.
Copy & paste your tube as a new layer - duplicate
Move the duplicate tube to the top of your canvas.
On the original tube press the small delete key to get rid of excess tube.
Seelctions select none.
On the duplicate tube layer - use your eraser tool get rid of the bottom half of the tube.
Now it looks like the tube is sitting inside your frame.
Copy & paste dust as a new layer
Image - resize 30% - 30%
Adjust - Sharpeness - Sharpen
Place where you think it looks best.
Layers - merge - merge visible
Crop & resize tag to your liking.
Add copyright - name & save as png
Thursday 15 March 2012
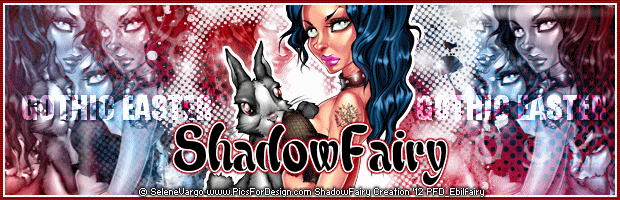
FTU Tutorial - Gothic Easter

*****
*Supplies*
Tube by SeleneVargo PicsForDesign
Fonts Impact - Babalu - pixelfont of choice for copyright.
*Plugins*
Eyecandy4000 - Gradient Glow
*****
Let the fun begin
New Canvas 620 x 200.
Make a gradient out of 2 colors from your tube.
I used - Foreground#b3020c
Background #3f7cad
Floodfill your canvas with the gradient.
Copy & paste your tube as a new layer - duplicate a few times & position where you like.
Screenshot of how I placed my tubes.

When your happy with your tube placement, hide the background layer & merge visible.
Unhide the background layer & change the blend mode of the tubes layer to luminance legacy.
Copy & Paste Vix_Texture5 as a new layer.
Change the belnd mode to Screen - lower the opacity to 80%.
Layers - Merge - Merge Visible.
With Font Impact size 24 type out GOTHIC EASTER
Move to the left (see my tag for refrence)
Duplicate - move to the right.
Layers - Merge - Merge the two word art layers together.
Dropshadow Vertical 3 - Horizontal -3 - Opacity 60 - Blur 5 - Color #000000.
Lower the opacity to 50% - Or play around with opacities & blend modes whatever you think looks best.
Layers - Merge - Merge Visible.
Copy the canvas & paste as a new layer minamise for now (well be using this for the avatar)
Copy & paste your tube as a new layer - position where you think it looks best.
Selections - Select All - Floadt - Defloat - Selections - Modify - Expand 3.
New Raster Layer floodfill with #ffffff - Selections - Select None.
Layers - Arrange move down.
Make sure your on the top layer of your tag.
New Raster Later floodfill with #ffffff
Selections - Select all - Selections - Modify - Contract by 5
Press the small delete key on your keyboard (or use your eraser tool)
Selections - Select None
New Raster Later floodfill with #ffffff
Selections - Select all - Selections - Modify - Contract by 3
Press the small delete key on your keyboard (or use your eraser tool)
Selections - Select None
Effects - Texture Effects - Blinds

Add your copyright.
If your not going to animate - Layers - Merge - Merge Visible
Save as JPEG
Animation.
Copy & paste background into Animation Shop.
There are 8 frames in the animation I used so I duplicated the background 8 times.
(quick way of doing this is hold ctrl & press L - keep pressing L until you have the correct amount of frames)
Edit - Select All
On Missy_burstanimation - Edit - Select All - Copy
Back to your canvas - Edit - Paste - Into Seleted Frames - move until you have it where you think you want it - then click on the canvas.
I wanted the animation on both sides of my tubes - if you'd like to do this - click on Missy_burstanimation
Make sure all the layers are seleted - Animation - Mirror - Edit - Select All - Copy.
Back to your canvas - Edit - Paste - Into Seleted Frames - move until you have it where you think you want it.
Then click on the canvas.
Animation - View.
If you like how it looks move on to the next step - if not just undo & try again until you have something you like.
Back in PSP close off the background of your tag.
Edit - Copy - Copy Merged - Paste into Animation Shop.
Duplicated so you have 8 frames.
Edit - Select All - Copy.
Make sure all the layers with the animation are selected - Edit - Paste - Into Selected Frames.
Save as gif.
Duplicate it & close off the original (only if you want to save a blank copy)
Edit - Select All
Back in PSP type out your name - I used Babalu & added a gradient glow.


Copy & paste into Animation Shop - duplicate so you have 8 frames.
Edit - Select All - Copy
On your tag - Edit - Paste - Into Selected Frames - move to where you think it looks best.
Save as gif
*****
Avatar
120 x 150 canvas.
Back to the canvas we left aside earlier.
Copy & paste it as a new layer - move around until you have something you like showing in the avatar
Copy & paste your tube as a new layer (follow the same steps as before to add the white boarder)
Make sure your on the top layer of your tag.
New Raster Later floodfill with #ffffff
Selections - Select all - Selections - Modify - Contract by 4
Press the small delete key on your keyboard (or use your eraser tool)
Selections - Select None
New Raster Later floodfill with #ffffff
Selections - Select all - Selections - Modify - Contract by 2
Press the small delete key on your keyboard (or use your eraser tool)
Selections - Select None
Effects - Texture Effects - Blinds
Add copyright save as JPEG
Subscribe to:
Posts
(Atom)
My Blinkie

I CT For


